HTML Template
Reading Time: 4.5 minutes
Hello guys and welcome to the continuation of our lesson in programming.
Previously, we've shown a string in a web page showing "Hello, Web!". In this chapter, we are going to show a real HTML page with data passed by the python backend.
render_template
In the previous lesson, we imported Flask, now we will just add render_template in the import.
from flask import Flask, render_template
render_template is a function in flask that generates a dynamic web pages by passing python data.
Creating a template
In a flask project, the server looks for the templates folder in the project and checks if a certain file matches.
Now let's create an html file inside a template folder in the root of our project. Let's call it hello.html. Your project structure should look something like this
├── geotag-album
│   ├── venv
│   ├── templates
│   |    ├── hello.html
│   ├── main.py
The same when we start writing html file in the previous lesson on the checklist app, we will use emmet (The exclamation point) to generate an html boilerplate. It's ok if it doesn't work for you, just type it in.
Let us try the following html code.
<!DOCTYPE html>
<html lang="en">
  <head>
    <meta charset="UTF-8" />
    <meta name="viewport" content="width=device-width, initial-scale=1.0" />
    <title>Hello</title>
  </head>
  <body>
    <h1>Hello</h1>
  </body>
</html>
In our main.py file, let us update our code. Let's change the return statement of our function.
from flask import Flask, render_template


app = Flask(__name__)

@app.route('/')
def index():
    return render_template('hello.html')
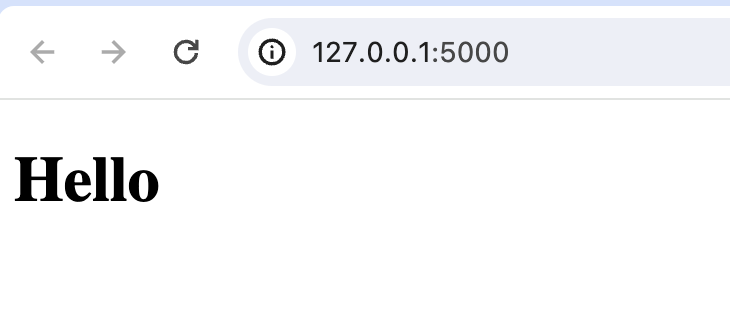
And now let's run our flask app again.
Passing data
Now as promised, we are passing data to our template in python.

Now let us define some data in our python code. Here we will discuss variable and data types in python.
There are many data types in python, but in the language itself, all data are treated as objects.
Let's say we have the following data.
| Name | Image URL | Latitude | Longitude |
|---|---|---|---|
| London Bridge | https://www.geoimgr.com/images/samples/england-london-bridge-225.jpg | 51.504105 | -0.074575 |
| Fly Agaric in German mountain area | https://www.geoimgr.com/images/samples/germany-allgaeu-fliegenpilz-225.jpg | 47.466905 | 10.20375 |
| English Garden in Munich | https://www.geoimgr.com/images/samples/germany-english-garden-225.jpg | 48.145727 | 11.587688 |
Let's try to put in a set of variables from the data in the first row.
name = 'London Bridge'
url = 'https://www.geoimgr.com/images/samples/england-london-bridge-225.jpg'
latitude = 51.504105
longitude = -0.074575
Here we have declare 4 variables. The first one we named it name to represent the name of the image. The next one is url. Both of them are of string data type as indicated by the surrounding '' quotation marks. In python, we can use either single qoute ' or double quotes " to represent a string.
For the latitude and longitude variables, they contain both floating point data type.
In python, a floating point data is a number type with decimal values.
Now you should have an idea of declaring a variable in python. We don't need to use let like we did in javascript. Just type in the name of the variable and put a data in it. So the signature of defining a variable in python is
variable_name = value
Now let's try to pass in that data in our template.
...# previous codes
@app.route('/')
def index():
    name = 'London Bridge'
    url = 'https://www.geoimgr.com/images/samples/england-london-bridge-225.jpg'
    latitude = 51.504105
    longitude = -0.074575
    return render_template('hello.html',
                           name=name,
                           url=url,
                           latitude=latitude,
                           longitude=longitude)
We passed some parameters after the 'hello.html' to the render_template function. What this does is it made them available for access in our template. Let's take a look.
In our html, we will replace the content of our body with some placeholders for our data.
<!DOCTYPE html>
<html lang="en">
  <head>
    <meta charset="UTF-8" />
    <meta name="viewport" content="width=device-width, initial-scale=1.0" />
    <title>Hello</title>
  </head>
  <body>
    <table>
      <tr>
        <td>Name</td>
        <td>{{ name }}</td>
      </tr>
      <tr>
        <td>URL</td>
        <td>{{ url }}</td>
      </tr>
      <tr>
        <td>Latitude</td>
        <td>{{ latitude }}</td>
      </tr>
      <tr>
        <td>Longitude</td>
        <td>{{ longitude }}</td>
      </tr>
    </table>
  </body>
</html>
Now as you can see above, all are normal HTML tags with some exeptions on lines 12, 16, 20, and 24. The ones surrounded by double moustache {{}}, they are template tags.
So the ones inside the {{}} are data that we passed and we consumed it in our html code.
If you want an in-depth understanding of html tables, you can go ahead and look at https://developer.mozilla.org/en-US/docs/Learn/HTML/Tables/Basics.
Summary
That's it for this lesson. We will dive in more into templates in later chapters.
So in this chapter, we've learned the following:
- Variables in python
- Python data types such as string and float
- Passing data from python to HTML template
So that's it. See you on the next one!