Checklist App - Part 1
Pre-Requisite
Please take note that this chapter requires that you have basic knowledge of using the terminal. If you haven't, go ahead and take the Terminal chapter to learn the basics of using it that we will need in this course.
Reading Time: 22.34 minutes
Introduction to Programming
Now we will introduce you to programming, assumming you have no prior experience. To start with, instead of getting you bore with all the basic concepts of programming and computer science by discussion, we will tackle them through a project.
Completing this very first project of ours will equip us with the fundamentals of programming in general.
What we will Learn
At the end of this lesson, the student is expected to understand the following principles anc concepts:
- Literals
- Variables
- Arrays
- Functions
- Using, and
- Creating
- Conditionals
- Loops
Aside from these concepts, we will also create a basic web application that in the way, we will encounter
- HTML
- Javascript, and
- CSS
What we Need?
For this chapter, we will be needing 2 basic things:
- First is the web browser, this must already been installed (we would prefer Google Chrome)
- Code Editor (Here we will be installing Visual Studio Code)
In this stage, we assume that you have the basic knowledge on downloading and installing a program to your computer.
Now if you don't have google chrome yet, please download and install it from https://www.google.com/intl/en_ph/chrome/.
Next is the Visual Studio Code. Download and install it from here https://code.visualstudio.com/.
After this step, make sure that you have Google Chrome installed by running it. Then to make sure that we will have no problem in Visual Studio Code (VS Code), open it from your terminal using code. This should open the visual studio code editor.
What we will Build?
The app we will be building in this chapter is a checklist app as mentioned earlier. It will have a very basic interface and very basic functionality. And it will look like this.
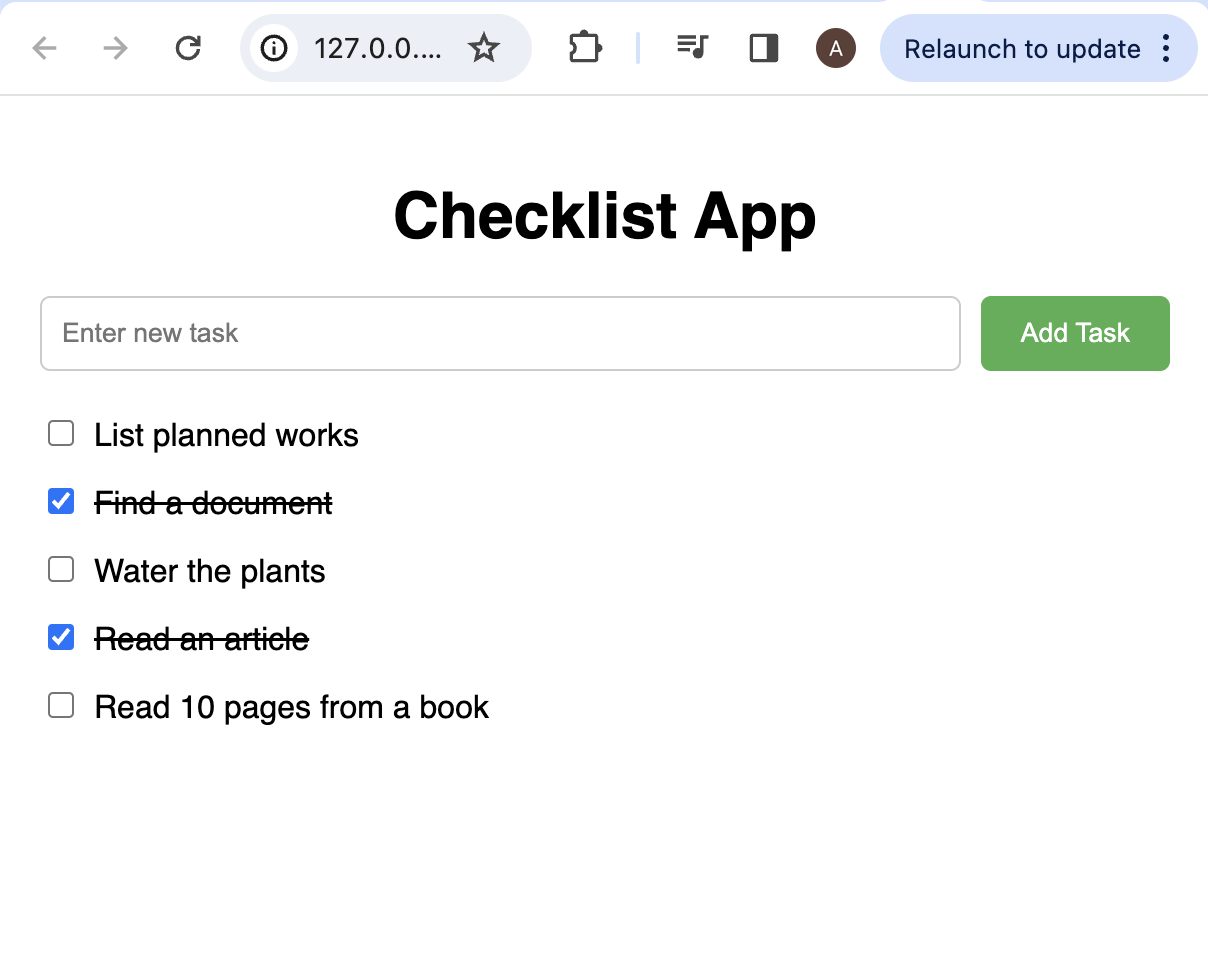
The functionality are:
- The user inputs a task or anything in the input box
- Click the
Add Taskbutton and the task will be added to the list - The user can check the task when done and it will have a line through in the text
Setting up the Development Environment
For this lesson, we will be using a programming language called Javascript. Javascript is built-in in any modern web browser and so we don't need to do anything there. What we want to setup in this stage is our code editor (Visual Studio Code).
In order to create a program, we must first create files known as source code files. These are files created by a programmer and are either interpreted or compiled in order for the computer to run.
Javascript is an interpreted language, so no compilation necessary there, our javascript code will be read directly by the browser.
First we will install a few extensions to help us in writing codes and running them.
There are 2 extensions for VS Code that we will use in this lesson:
- Prettier (For formatting our code)
- Live Server (For running a local server for our app)
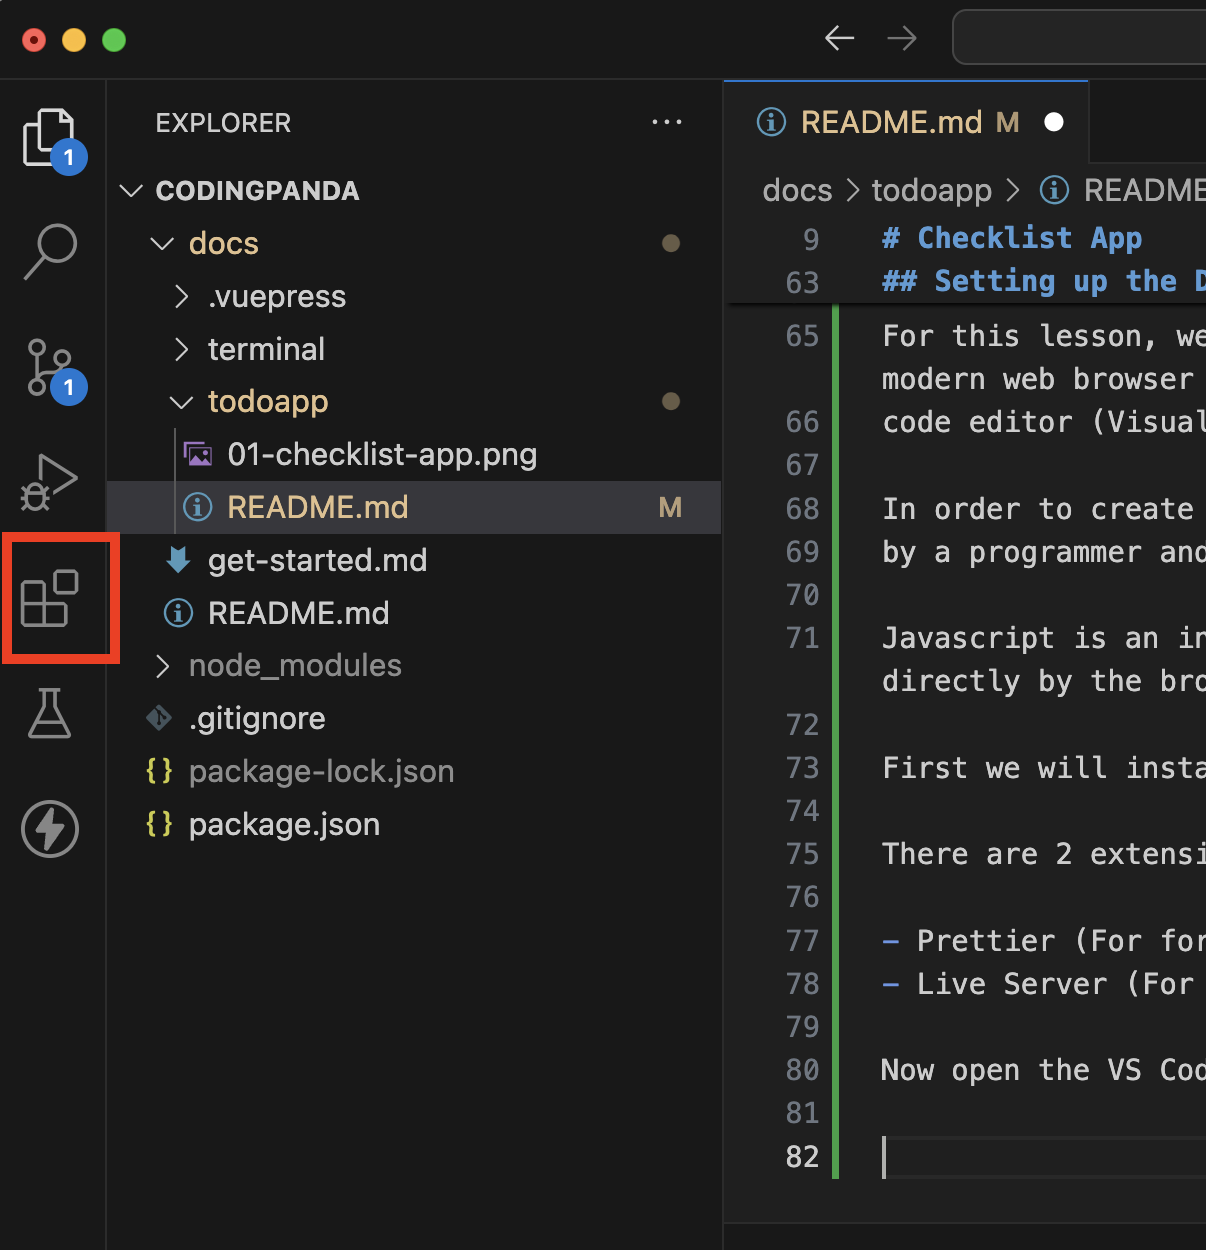
Now open the VS Code and click on the Extensions button on the left of the window.
Search prettier in the search box and click and install the first result.
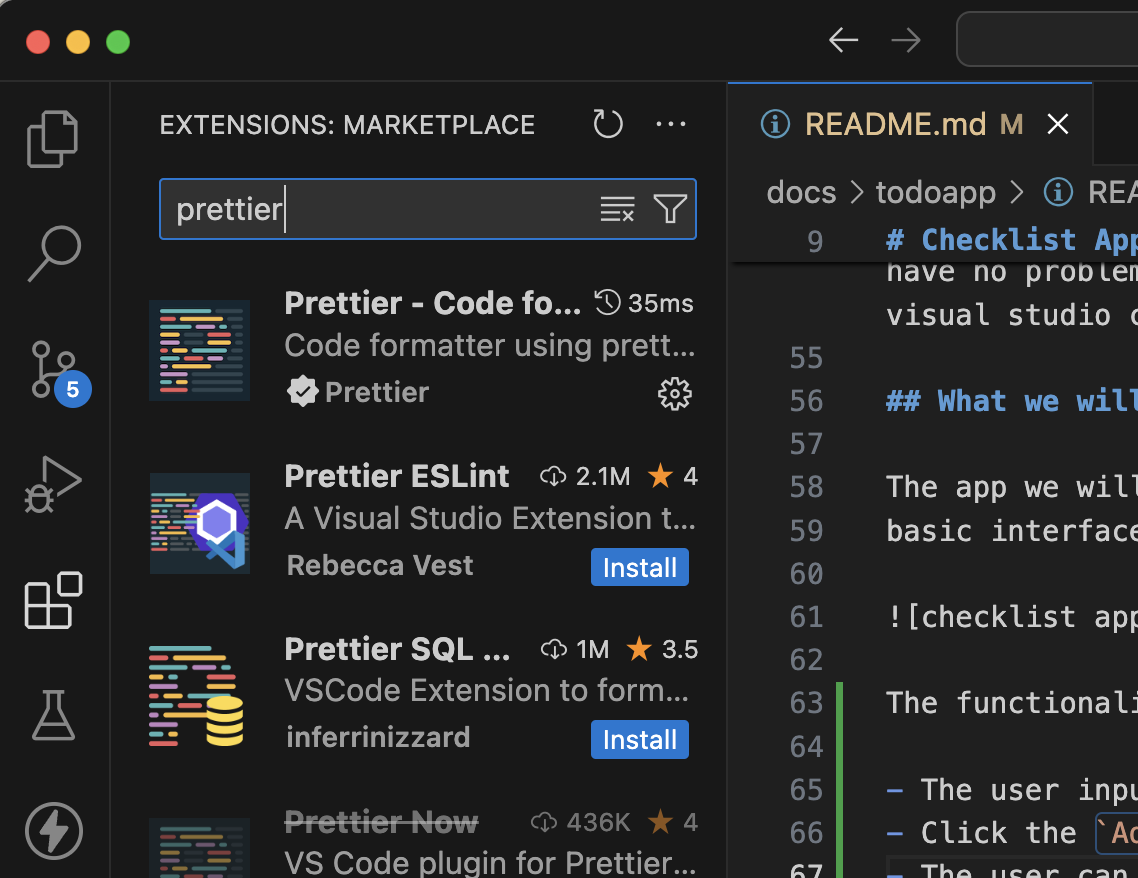
Mine is already installed that's why I don't have an Install button.
Next search for live server and install the one from Ritwick Dey. It should be the first result at the time of this writing.
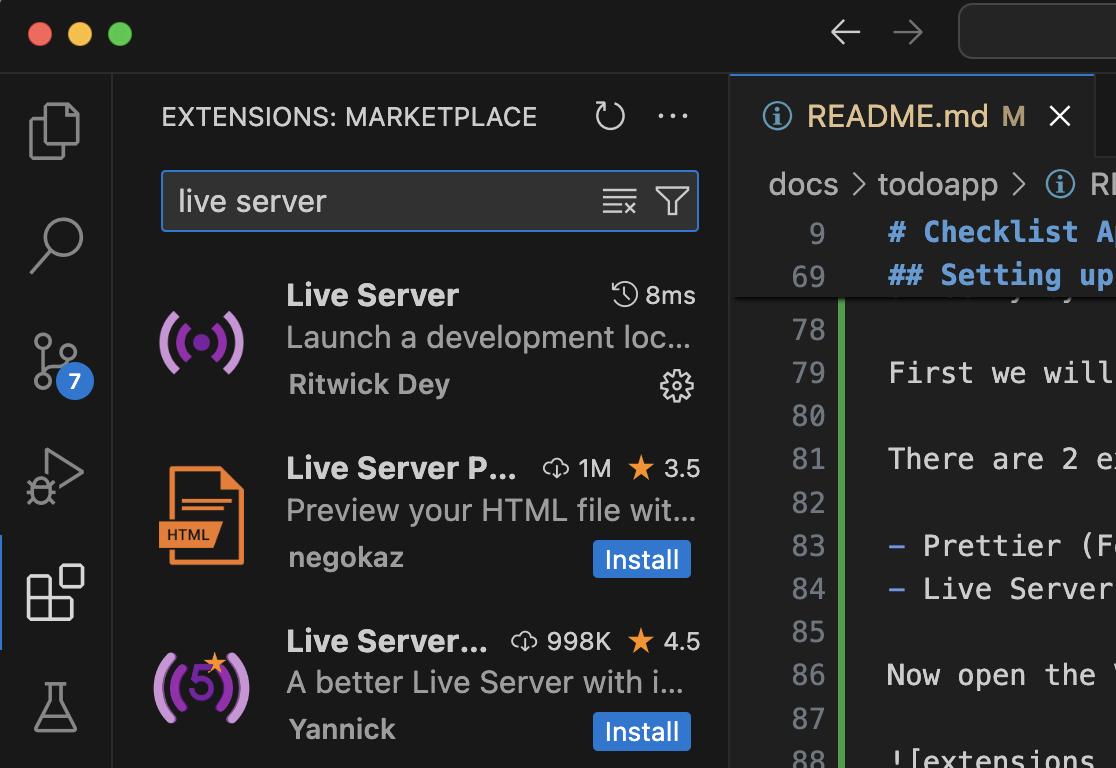
After installation, you should see the button for Go Live at the bottom right of VS Code. We will use this to open a local server when we are ready to preview our code.
Create the Project Location
Now that our code editor is ready, we will start building our project.
Using the terminal, navigate to your desired location where you will put the project. Create a folder and will create 3 files inside it.
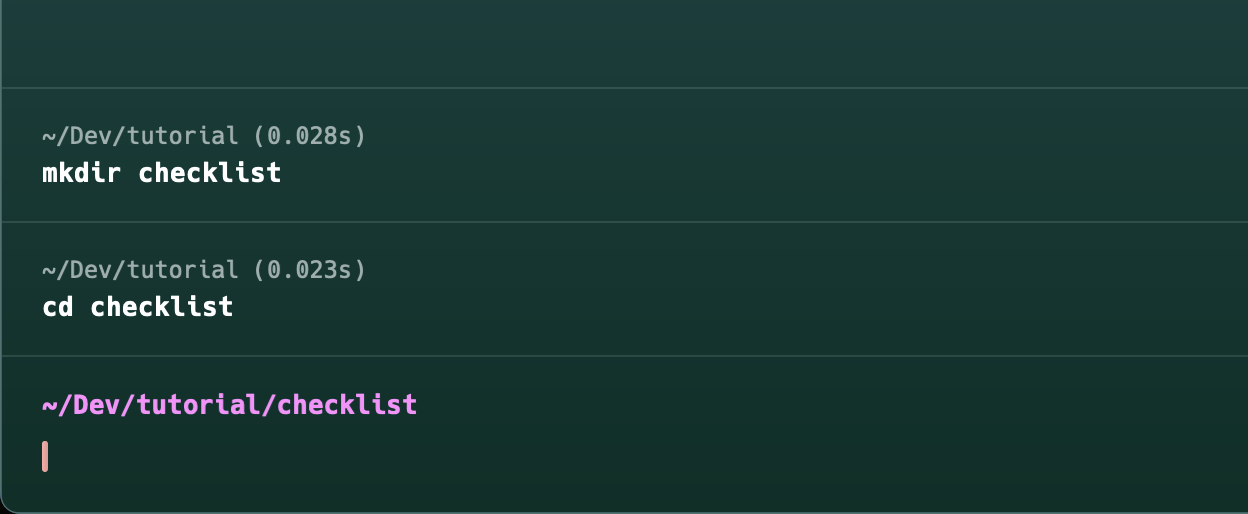
For me, using terminal, I will go to my Dev directory, then tutorial directory and I will create a folder named checklist. And I will go inside it using cd command.
Create the Files
Now that we are inside the directory where we will build our project and assuming that VS Code is properly installed, we can now open our code editor inside our project directory using code ..
The code command is a commandline utility installed alongside the VS Code. Giving it an argument . tells it to open the code editor at the current location.
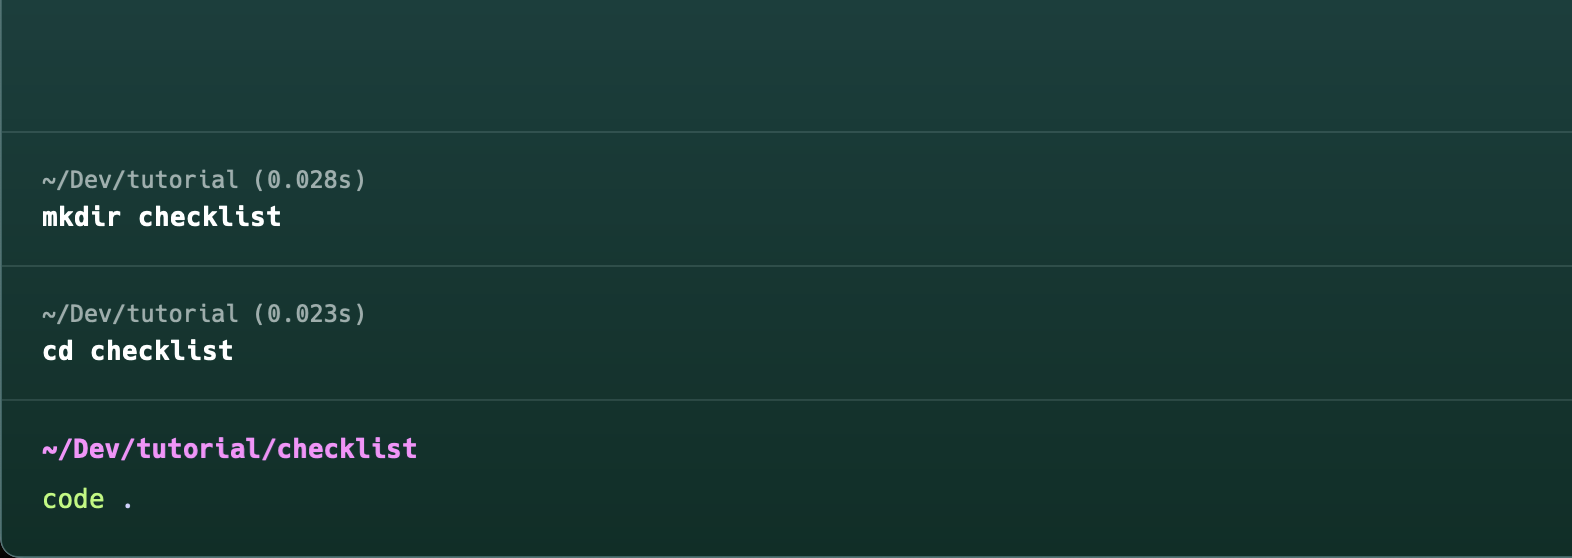
This will open the VS Code.
VS Code
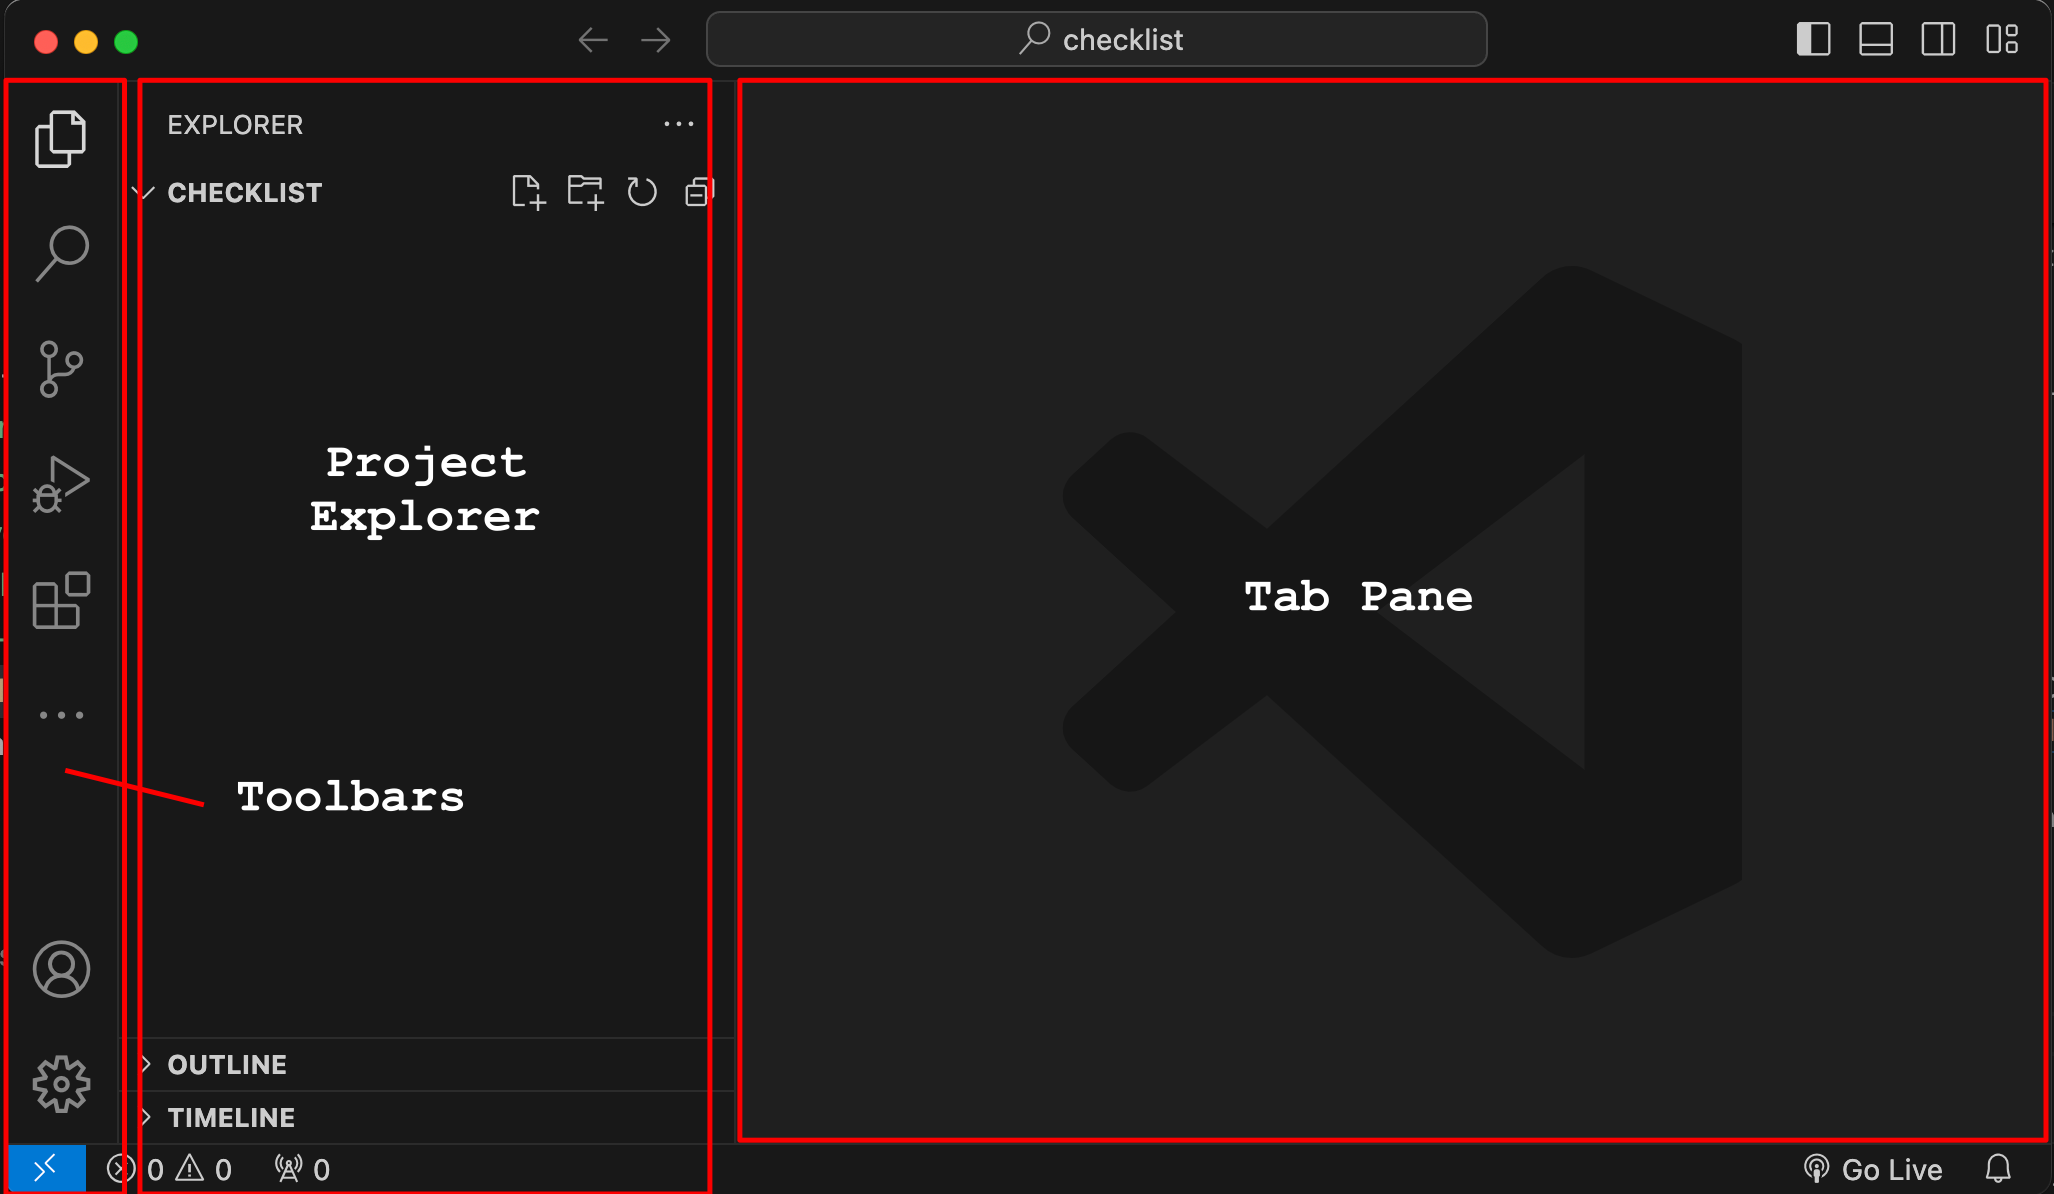
We will be interacting much of our coding time with VS Code. This will be our IDE (Integrated Development Environment).
Let's first talk about our code editor.
From the left are the toolbars, we have used the Extension button there. To the right of it is the Project Explorer, this is where the files we create will be listed. And the last one is the tab pane, all the files that we open from the Project Explorer will be opened here in tabulated form.
Create The Files
Now let's discuss about creating our source codes.
At the upper right of the Project Explorer, if you hover over it, four buttons will appear:
- New File...
- New Folder...
- Refresh Explorer, and
- Collapse Folders in Explorer
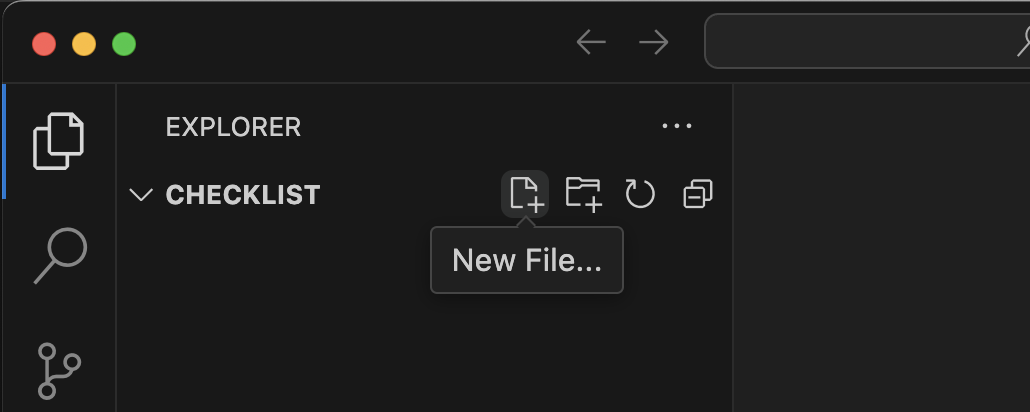
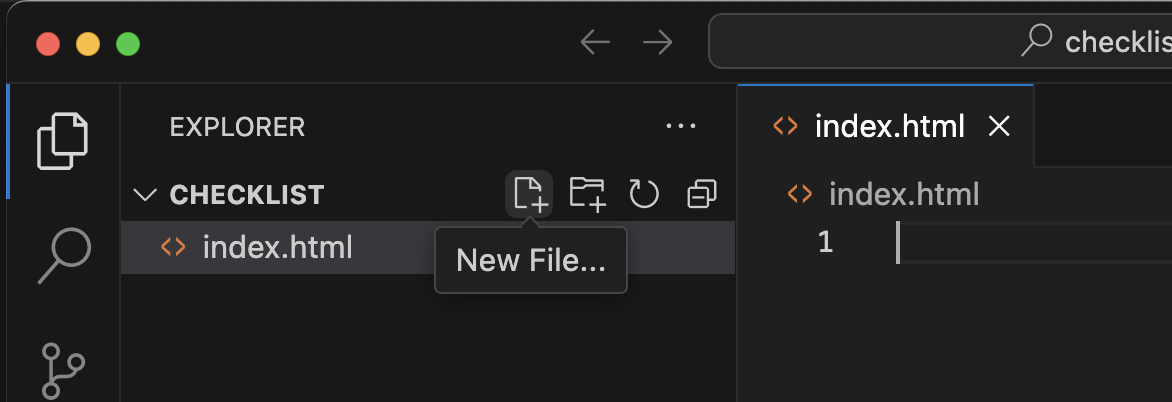
We are interested now in the New File... button. Click on it to create a new file. First we will name it index.html.
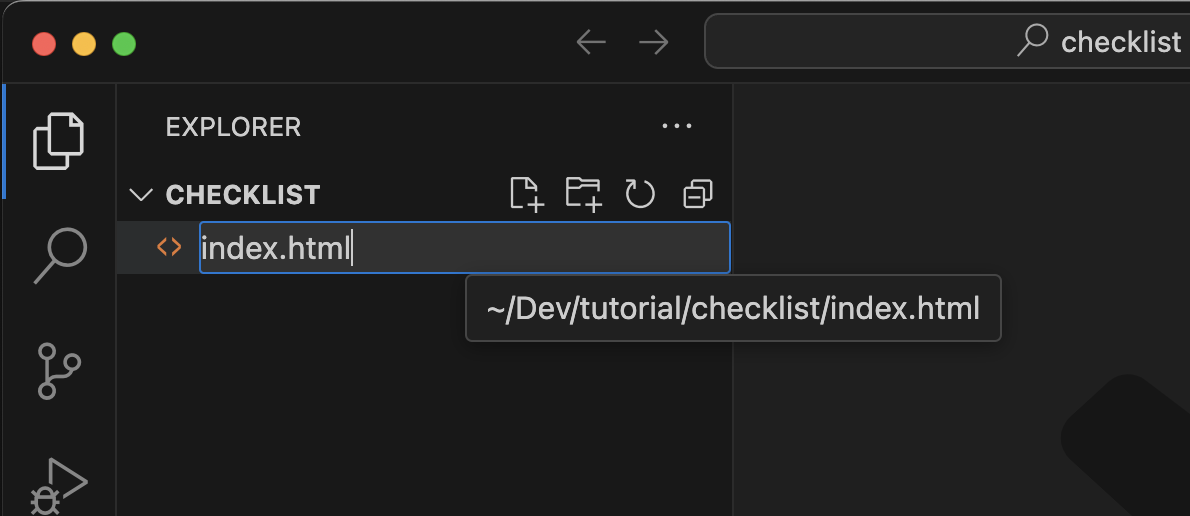
After pressing Enter or return key on the keyboard, you will notice that the index.html file will be opened as tab in the tab or editor pane.
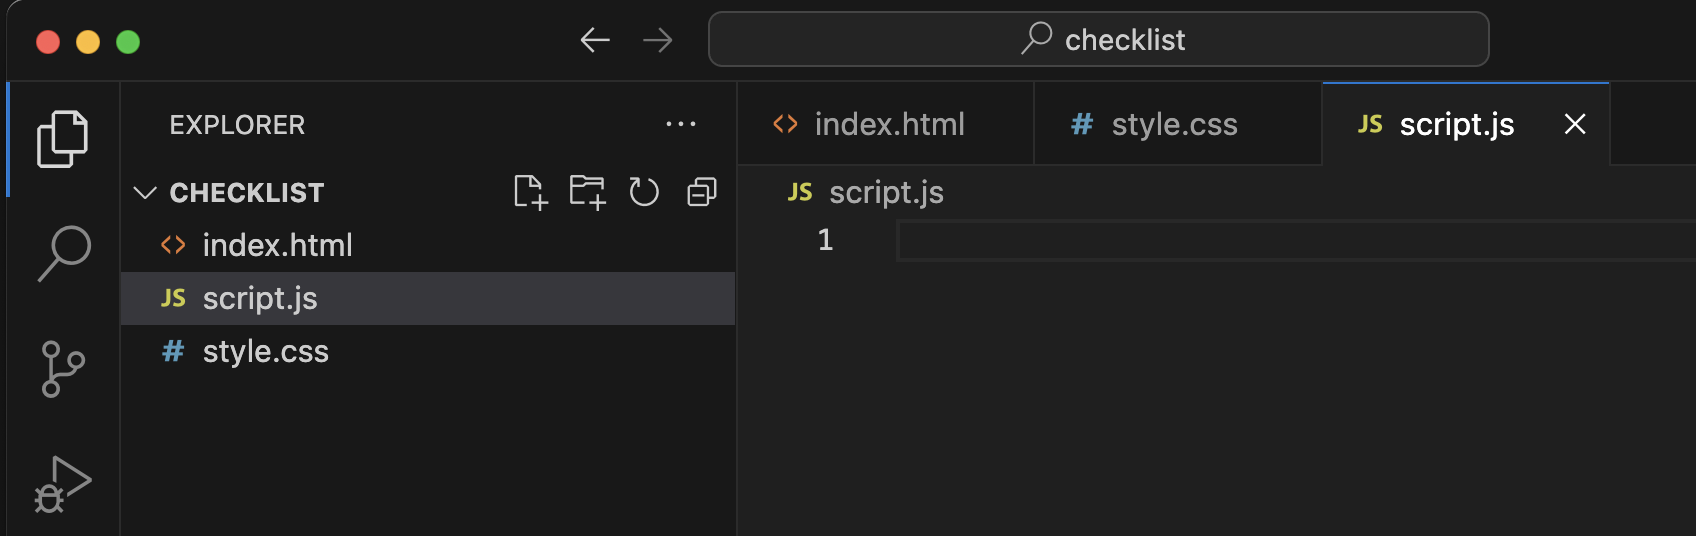
Now let's create the other 2 files, style.css and script.js. Please take note of the filename extensions.
Tips
Take note in the future that file extensions for source codes are merely a convention. The code will still be executed by the compiler or interpreter even if you ommit the extensions.
HTML Page
The programming language we will be dealing with in this lesson is Javascript. This will reside on the script.js file.
So if we will be dealing with that, why do we need the 2 more files (index.html and style.css)?
Well let's see.
First, we need something to represent the interface of our program, yes we can create a program in javascript with only the script.js file but that's it. There is no way for use or the user to interact with it or to even see it.
There are ways to let user interact with a software, more commonly this modern day is with the GUI or Graphical User Interfaces. These are windowed applications that we normally interact with in our day to day tasks with a computer such as web browser for opening mails and browsing the web, Microsoft Word if we want to create and edit douments and so on. But in this lesson, we will not yet create such interfaces, for now, we will let the users interact with our program through a web browser, so we will be building a web page or web application.
The web page will be open by the use of such web browser, and in this tutorial, from the previous section, we let you download and install Google Chrome, a web browser created by Google.
A web browser renders a page and the page in structured and created using HTML (Hypertext Markup Language). Okay so that goes our index.html, but how about style.css?
Well, plain html is not that good looking. Before, webmasters are only designing webpages using html and it's not that great. So now came CSS or Cascading Stylesheet. CSS is what gives web pages appealing look.
So to summarize, in modern web applications, we are going to need, html, css and javascript. Javascript and CSS are imported to html so the html can use them. To show you a little bit of representation, please look at the diagram below.
Now let's go and create our first html file. Go ahead and click on the index.html from the Project Explorer and the html file will open on the tab pane. Here we can now edit it's code. Initially, it will be empty.
Using the VS Code emmet abbreviation, type in an exclammation mark ! in the code editor inside the index.html file and you will see the following:
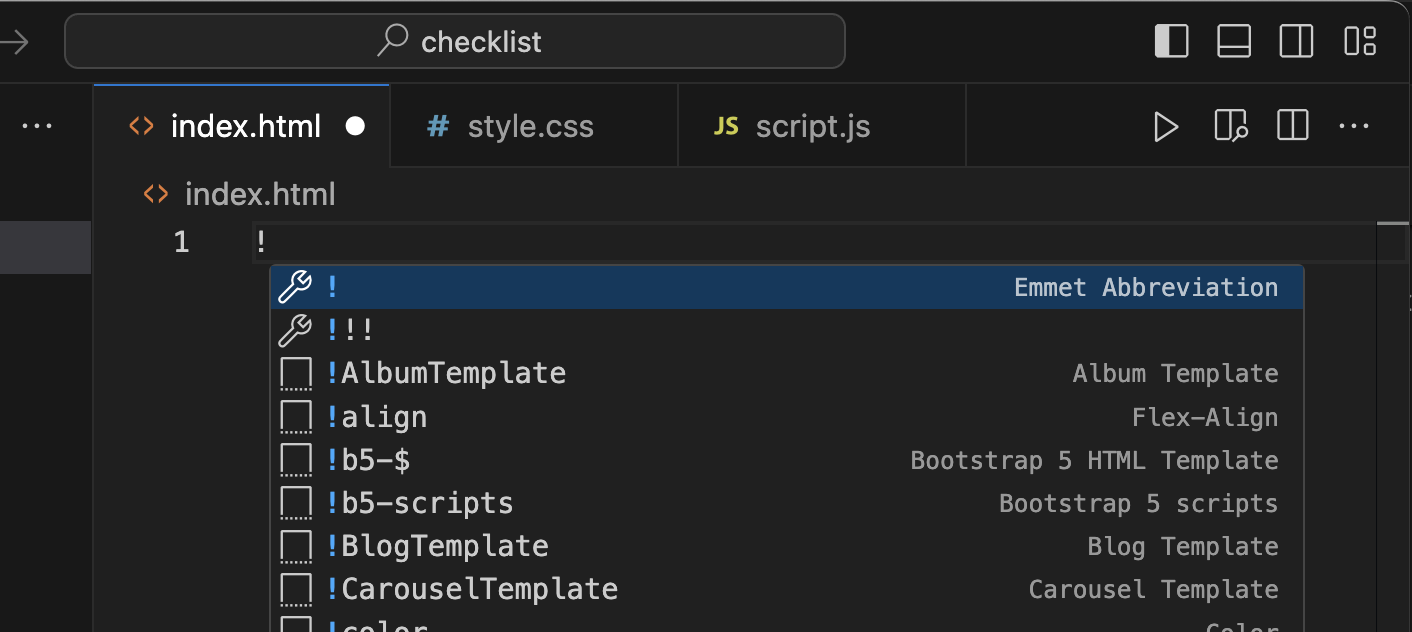
Now press Enter key or return on the keyboard and you will see an HTML boilerplate handed to us by VS Code. So that we don't have to type in manually.
We won't be dealing much into this because our focus is into the programming language. We will just use this and learn what we need in order to create our app.
Two tags I want you to notice, the head tag and the body tag.
The head tag is where we can include our css and javascript files. However, sometimes, the javascript file is most often seen just before the closing of the body tag.
You can see the opening <head> is partnered with a closing </head> tag. This is most often the case, however there are some html elements and instances that doesn't need to follow this rule.
The interface or the elements that the users sees are placed inside the <body></body> tag, so this is where we will mostly work.
Importing CSS and Javascript File
Now that we have the boilerplate of the html setup, let us now import the css and javascript files.
First inside the head tag, we will import the css using the following code.
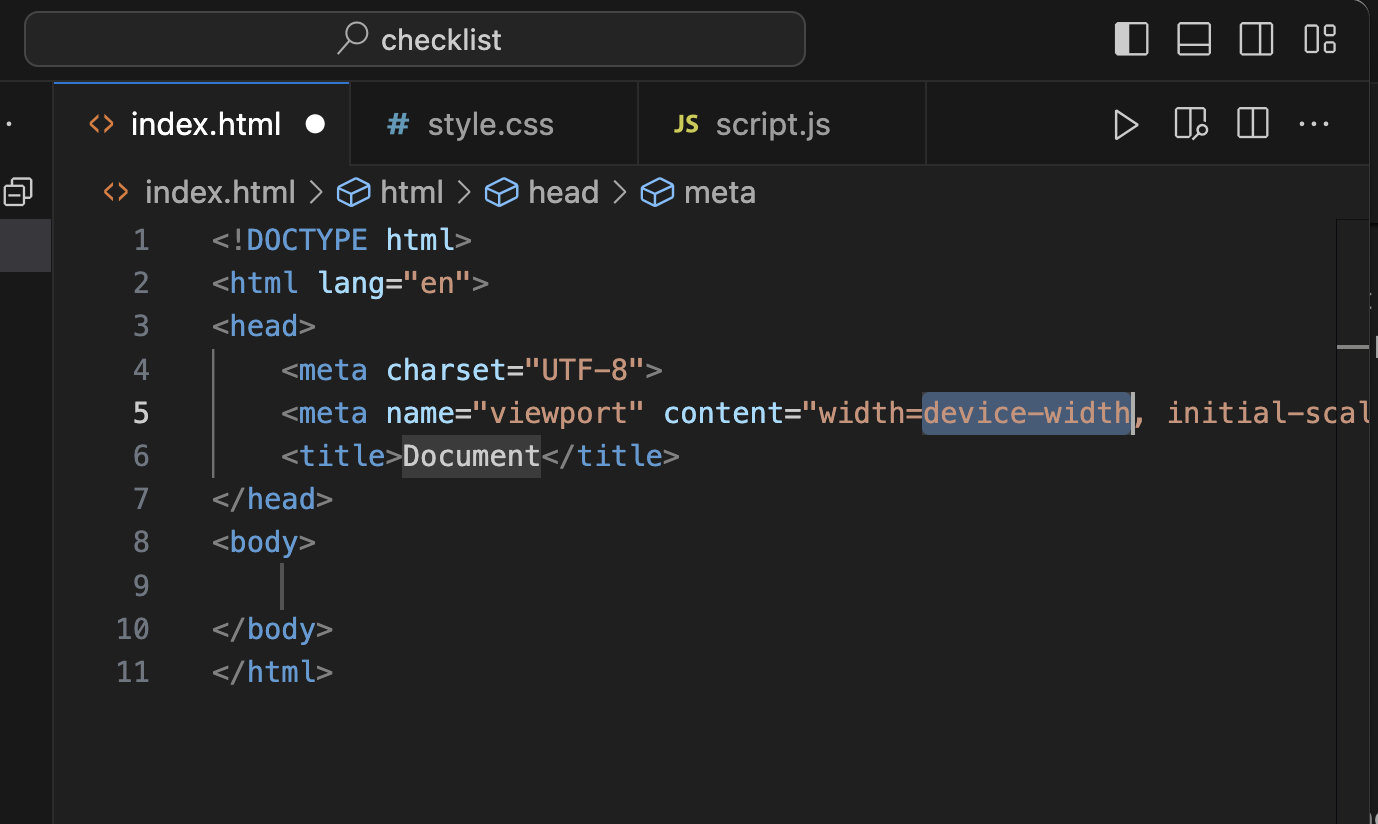
<head>
  <meta charset="UTF-8" />
  <meta name="viewport" content="width=device-width, initial-scale=1.0" />
  <!-- Importing of css file -->
  <link rel="stylesheet" href="/style.css" />
  <!-- End of importing css file -->
  <title>Document</title>
</head>
Here, the importing is done with
<link rel="stylesheet" href="/style.css" />
The href property points to the address or location of the css file we want to import. In this case, our css file is alongside our index.html as can be seen in the Project Explorer.
In the code blocks above, you can see on the left side, there are numbers that are arranged vertically. These are called linenumbers and usually present on code editors to help us map the location of our specific code.
For instance, notice before and after our code for importing, the codes at lines 4 & 6? Those are html comments and they are not parsed by the browser.
With the help of line numbers, we can easily look up our code.
We write comments in html with
<!-- You comment message here... -->
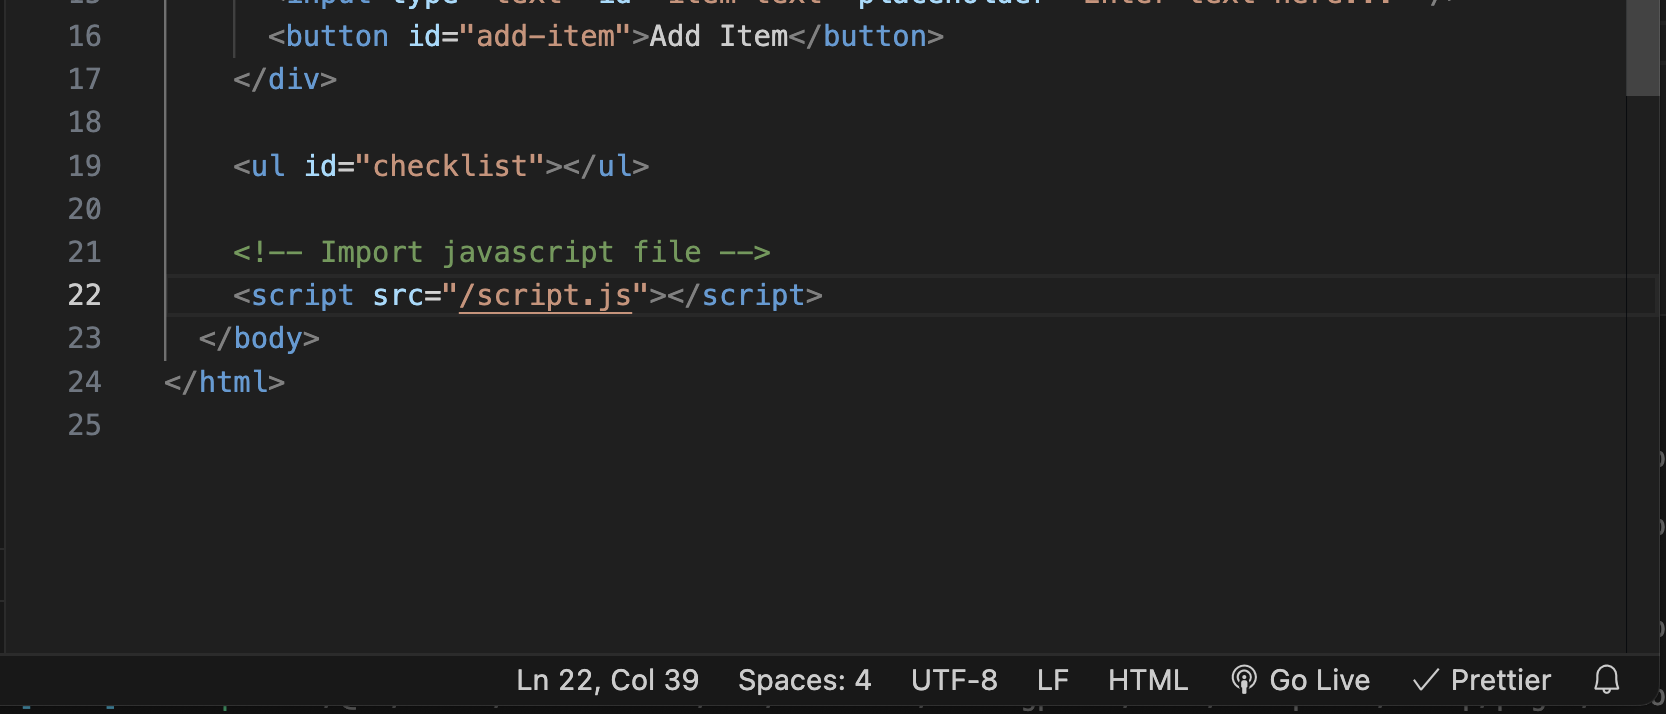
Now that the css is imported, we will now proceed with importing our javascript file. We will do this inside the body tag and just before the closing tag, </body>.
<!DOCTYPE html>
<html lang="en">
  <head>
    <meta charset="UTF-8" />
    <meta name="viewport" content="width=device-width, initial-scale=1.0" />
    <!-- Importing of css file -->
    <link rel="stylesheet" href="/style.css" />
    <!-- End of importing css file -->
    <title>Document</title>
  </head>
  <body>
    <!-- Import javascript file -->
    <script src="/script.js"></script>
  </body>
</html>
At line 13 above, that is where we injected the script tag where we load the javascript file.
Page Content
Now, we will layout the contents of our app, we will have 4 elements in the html:
- The page title
- The input text
- The button, and
- The UL (Unordered List)
So here they are.
<!DOCTYPE html>
<html lang="en">
  <head>
    <meta charset="UTF-8" />
    <meta name="viewport" content="width=device-width, initial-scale=1.0" />
    <!-- Importing of css file -->
    <link rel="stylesheet" href="/style.css" />
    <!-- End of importing css file -->
    <title>Document</title>
  </head>
  <body>
    <h1>Checklist App</h1>

    <div id="checklist-form">
      <input type="text" id="item-text" placeholder="Enter text here..." />
      <button id="add-item">Add Item</button>
    </div>

    <ul id="checklist"></ul>

    <!-- Import javascript file -->
    <script src="/script.js"></script>
  </body>
</html>
Let's break it down:
- On line 12, we have the page title enclosed in an
<h1></h1>tag. - On line 15 and 16, we have the input text and the button. Notice that we put
idattribute for both of them. - On line 19, we put a placeholder for an unordered list enclosed in
<ul></ul>tag.
And that will be almost all for our html file!
Now let's preview this in the browser using our live server extension of VS Code. At the bottom of the VS Code, click on the button for live server named Go Live.
Your default web browser should open up and you should see something similar like below
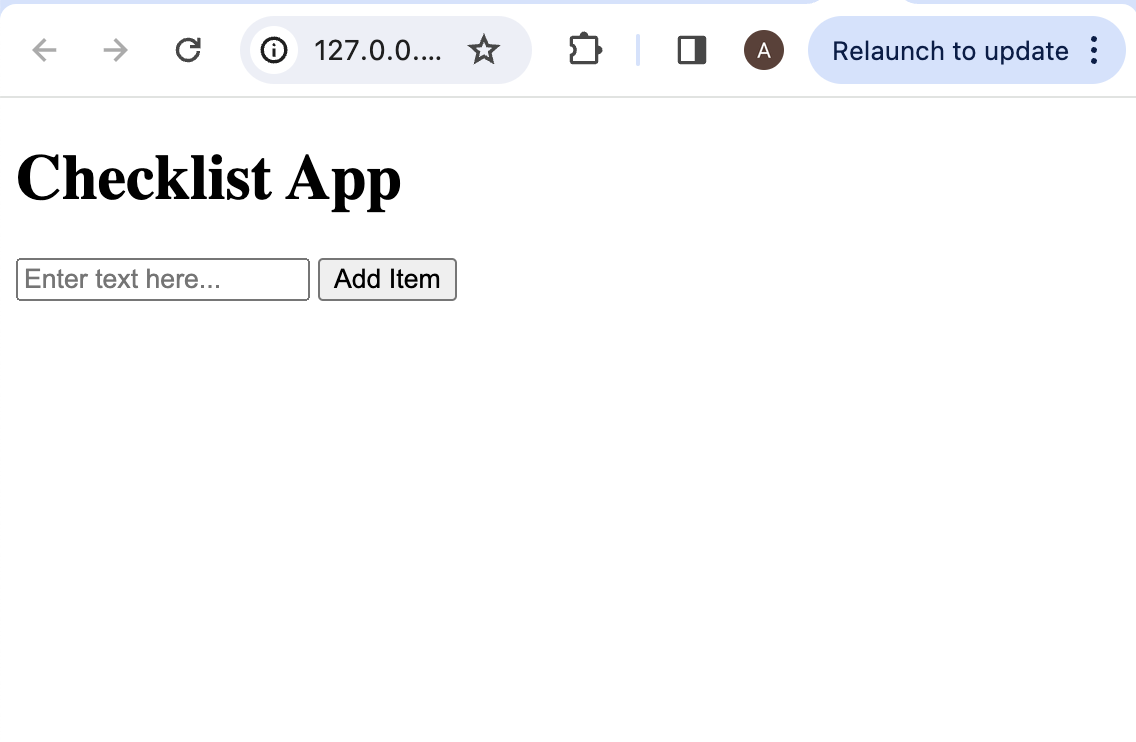
Congratulations!
You have now a working web page! 🎉!
Javascript File
On the previous sections, we have imported the javascript file in our html. It is time to test if it is actually working.
First up, we will try the button element <button id="add-item">Add Item</button>. Let's now open our javascript file and let's reference with our button.
Now copy the following code to the javascript file.
// Function to be called when the button is clicked
function buttonClicked() {
  window.alert("Hellow, World!");
}
This code is a function that when called, will make the browser show a pop up greeting us with a message "Hello, World!". But this won't work yet. If you click our Add Item button in the browser, nothing will happen. That is because we haven't tied up the button to this function yet.
Let's do that.
In our html code, we will add an event attribute to our button. Edit our button code from
<button id="add-item">Add Item</button>
<button id="add-item" onclick="buttonClicked()">Add Item</button>
The onclick="" is called an event attribute that ties up a javascript function to the button when the button is clicked. In this case, we give it a function buttonClicked().
Remember this on a function, when we call a function, the syntax is the name with and open and close parenthesis ().
For now, let's try this. Make sure that you saved the 2 files, the script.js and index.html file after editing so that our code changes will take effect.
When you click the Add Item button, it should respond like this.
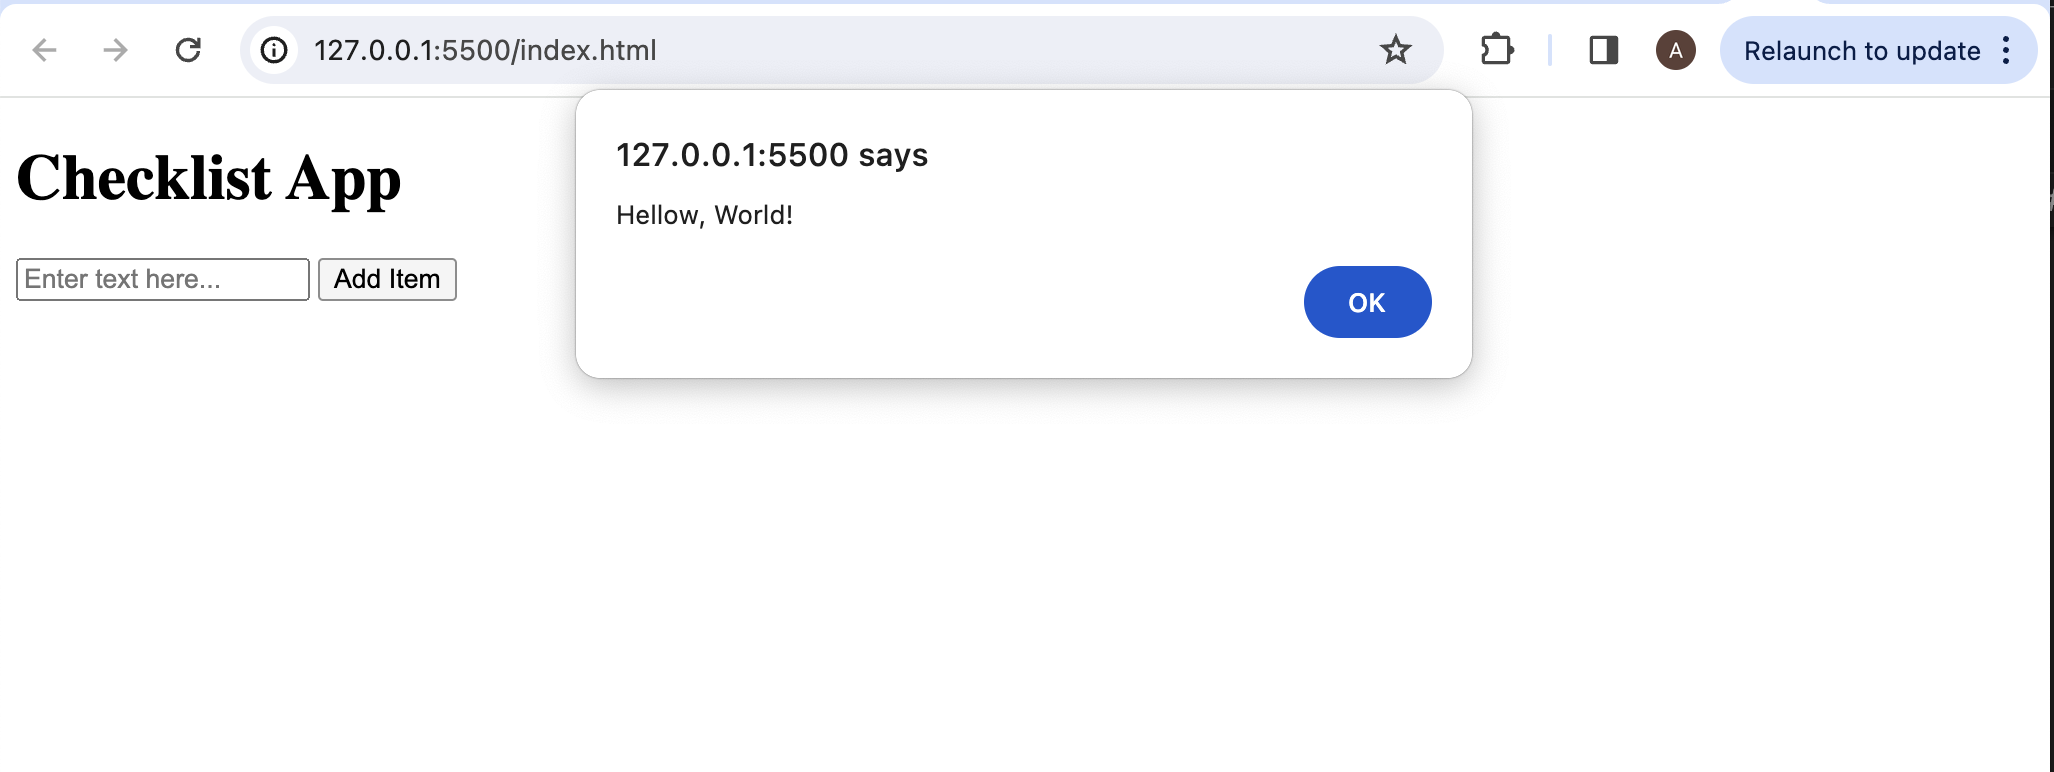
Hooray!
Our javascript code is working!
Function
Now that we know our javascript is connected to our html and the function is working, let's talk about function.
A function in javascript or in any other language in general is a block of code, a group if you may, that consist of one or several program statements or instructions.
From our function buttonClicked, we only have one instruction or statement and that is
window.alert("Hellow, World!");
What this does is it displays an alert box to the user. This statement uses a function called alert. This said function accepts a string literal surrounded by quotation marks.
To get more about this function, please refer to the documentation shown below
Window: alert() method
It accepts a message that you want to display to the user.
A literal is a value with specific data type. In this example, the literal "Hello, World!" is a string. There are different data types in javascript that we will discuss later on.
Statement
In javascript, a statement is one or more line of codes that represents instructions to the computer and ends with a semicolon ;.
The good thing about using VS Code is that, when it detects that you are done with your statement, it automatically inserts the semicolon for you. Unlike the old days of programming in the languages such as C and C++ where the programmer may often forgot a semincolon and the compiler shouts at them.
Now let us work again in our buttonClicked function. For this, we will try to get the content of the input text that we gave an id of item-text. To get the reference to the input box,
Constants and Variables
const inputBox = document.getElementById("item-text");
In the statement above, we declared a placeholder called constant represented by the keyword const with the name inputBox. This inputBox now holds a reference to our input box in the html code. This is ensured by the id "item-text". You may read the reference about it at Document: getElementById() method.
This constant now holds the reference to the input box object. But we are not done here, what we want is the value of the input box. But before that, let us first create a variable to hold that value.
const inputBox = document.getElementById("item-text");
let inputText = "";
Below the constant, we added a new statement. This is a declaration of a variable in javascript. The let keyword tells us that it is a variable. We can also use the keyword var here but I prefer this one.
The difference between the two is that constants are immutable. They cannot change. That is why when we declared it, we also initialized it with a value instantly. Variables on the other hand can change values, that's why they are called variables.
To continue with our javascript code let us examine the code below
const inputBox = document.getElementById("item-text");
let inputText = "";

// Function to be called when the button is clicked
function buttonClicked() {
  inputText = inputBox.value;
  window.alert(inputText);
}
Inside the function, I replaced the "Hello, World!" alert with 2 lines of code.
Line 6 sets the value of our variable inputText to the value of the inputBox object. Then line 7 shows that value using alert again. Let us run our code to try if it works as intended.
Try to enter an item in the input box on our page and click on the Add Item button
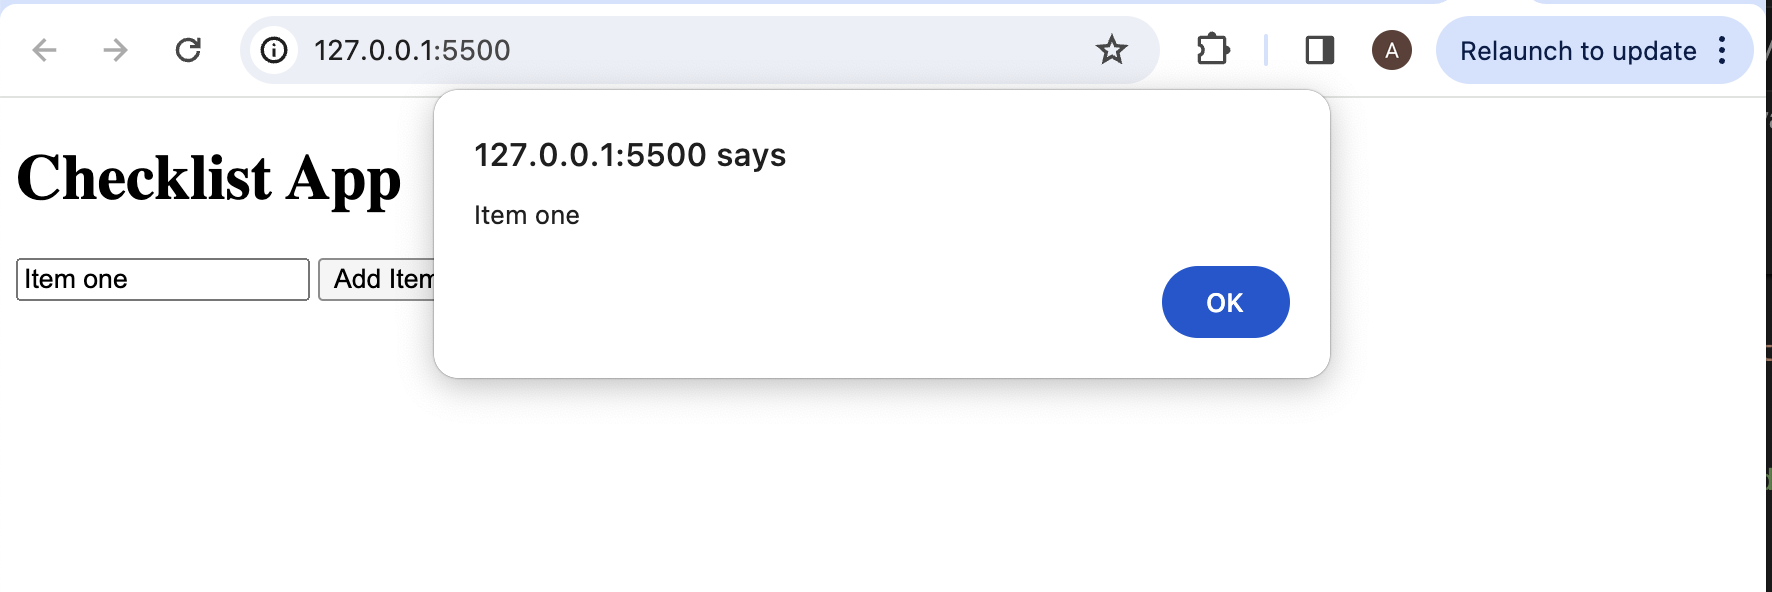
You should see something similar above.
As you can see, it shows the content of the input box in the alert window.
Now we know that we can read the input box using our javascript code. If you ever get stuck and your code doesn't seem to work, please use the comment system below to post your question or query and I will try my best to respond immediately.
Since we know that:
- Our button works
- We can read and retrieve the content of the input box
It is now time to display the items as a list. This is where this element
<ul id="checklist"></ul>
in our html is for.
Injecting HTML with Javascript
We will be utilizing the list element of html to display our checlist. There is not the only way to achieve our goal but just for this chapter, we will go with it.
Let us first look at how we can display a list in an html document, please refer to the code below:
<ul>
  <li>Item one</li>
  <li>Item two</li>
  <li>Item three</li>
</ul>
Looking at the code above, we have an outer tag of <ul> with it's corresponding closing tag </ul>. Between those are the list items denoted by <li></li> for each one.
In our actual code, you may have noticed that our <ul> tag has an "id" attribute, this is what we will use to get a reference to our element.
Most of the elements in html has an "innerHTML" property. These are elements that can have child or children. So why did I mentioned this? Well, it turns out that this property can either give us the content or we can set content for the element.
Using the contents of the List sample code listing above, let us try to put them inside a string and assign to the innerHTML property of our list.
const inputBox = document.getElementById("item-text");
let inputText = "";
// Create a constant that will hold our list element
const list = document.getElementById("checklist");
// Function to be called when the button is clicked
function buttonClicked() {
inputText = inputBox.value;
}
// When the page loads, let us set the contents of innerHTML property of our list
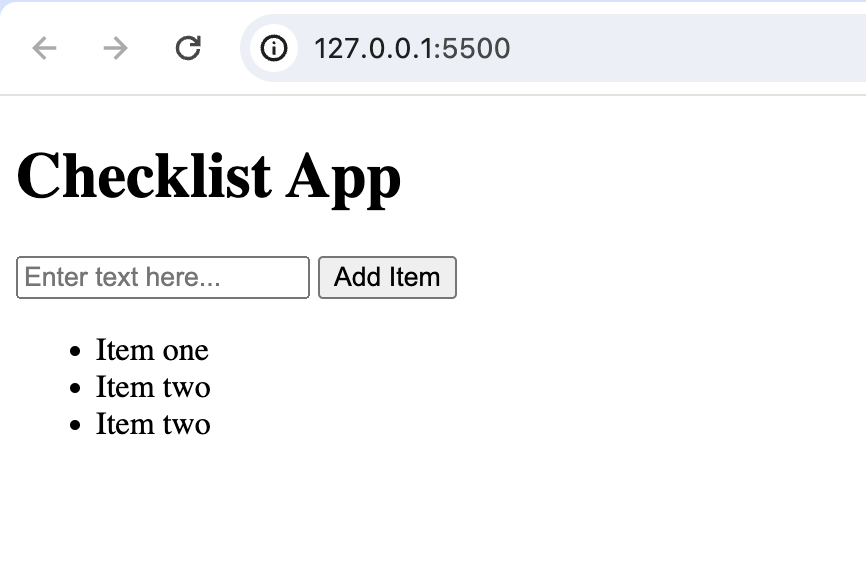
window.onload = function() {
list.innerHTML = `
<li>Item one</li>
<li>Item two</li>
<li>Item two</li>
`;
};
In the code above, I've highlighted the codes at lines 4-5 and 12-19. They are the code additions to our previous code of javascript.
On line 5, we have declared another constant that will hold reference to our list, giving it an id of what we have in our html.
Now on line 13, we give a function to the window.onload event. The function we gave to it will be executed when the page loads. And inside that function, we set the value for our list.innerHTML to a bunch of list items and we put it inside a pair of back ticks. Inserting string literals inside a back tick makes them template literals and gives more advantage than a regular string enclosed in "".
Our app should now look like this
With this knowledge, we now know that we can add any string that forms an html code and put it inside the back ticks. For example, we can even add a heading tag to the list, not just list items
// When the page loads, let us set the contents of innerHTML property of our list
window.onload = function () {
  list.innerHTML = `
    <li>Item one</li>
    <li>Item two</li>
    <li>Item two</li>
    <h2>This is a heading tag added inside a list.</h2>
  `;
};
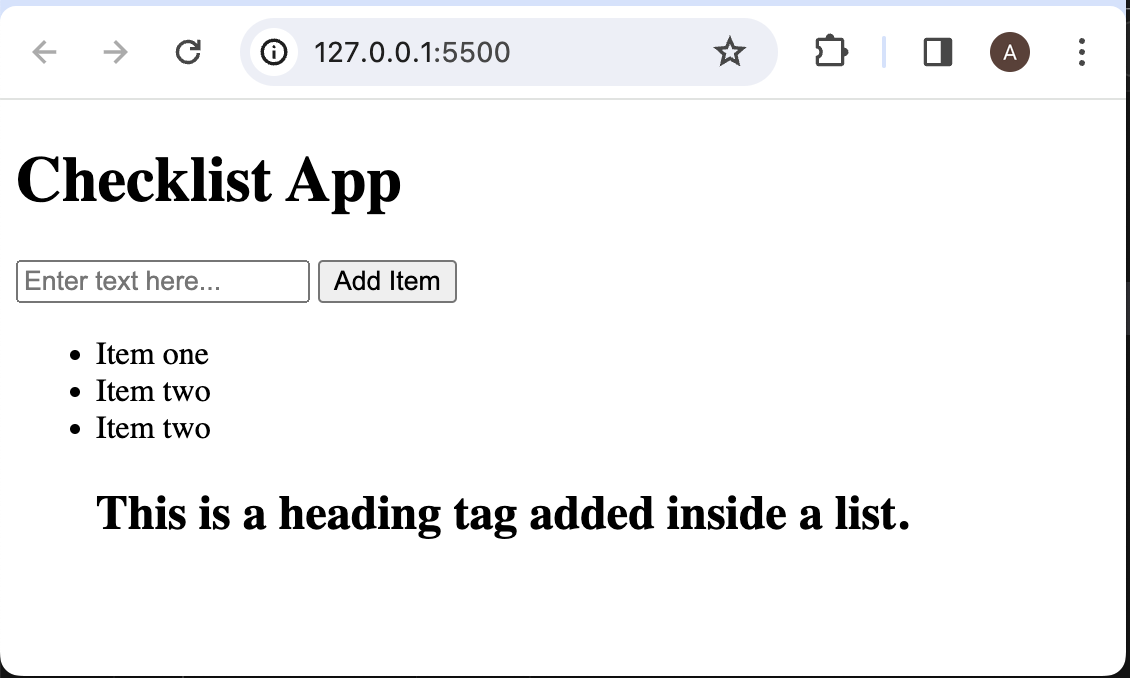
With all that in our knowledge, we can get some sort of idea that we can evidently put anything into an "innerHTML" property within our control!
Array Variables
We will now create a new variable (placeholders that are declared using let). This one is an arry.
// Declare an empty array
let items = [];
The above is an empty array, meaning, it holds no values at all.
An array is a type of variable that holds a collection of objects in javascript. It can hold any type or combination of types. The contents of the array are enclosed in square brackets and separated by commas.
We can hold a collection of numbers like
let ages = [12, 16, 21, 10];
or strings
let names = ["Danilo", "Ruben", "Victor"];
or even combination of them
let fruits = ["apple", 10, "orange", 4, "banana", 20];
We will learn some basic concepts about arrays along our lesson here.
Let us now delete the code for the window.onload as it was just for testing purposes to test if we can really attach html code using javascript programmatically.
Our code should now look like this
const inputBox = document.getElementById("item-text");
let inputText = "";

// Create a constant that will hold our list element
const list = document.getElementById("checklist");

// Declare an empty array
let items = [];

// Function to be called when the button is clicked
function buttonClicked() {
  inputText = inputBox.value;
}
The idea here is, since arrays can hold collection of things, we will put our checklist items in our array variable. We use variable because it updates over time every time we add items to it.
So now logically, if we think about it, we add items when we click the Add Item button right? So what we will do now is everytime the button is clicked, the buttonClicked function is called right? We will then put our logic that handles the inserting of item inside the buttonClicked function.
What we will put to the array? Of course the content of our input box which will be held by our inputText variable.
// ... Previous codes ...
// Function to be called when the button is clicked
function buttonClicked() {
  inputText = inputBox.value; // Put the content of input box to the variable

  // Add item to the array using Array.push method
  items.push(inputText);
}
In an array, you add item using the method push inside an array object. Array.prototype.push
Now our variable array can have contents everytime we push the button right? but how do we show them on the list?
One solution is that we can go through the array one by one and generate an html string to be put to our list.
Please go on to Part 2 - Checklist App for the continuation of this lesson.
Extra Lesson
Comments in Javascript
Little discussion as extra lecture for comments in javascript.
In lines 4 & 12, there are statements that starts with a double forward slashes. These are called inline comments. If you want to give your code a comment for the reader to see, this is one way to do it. And this is restricted to one line of comment only. If you want this way and you want multiple lines, just do it repeatedly.
Comments are not executed by the program. They are there for us humans to read and have a hint on what the code does or as what the programmer intended us to see.
You may use one line comment that starts with // or you can use multi-line comment with
/*
This is a
multi-line
comment.
*/
You put your multi-line comment in between /* and */.